Friday, June 29, 2007

Egg Dumplings and Stuffed Cakes

Egg Dumpling

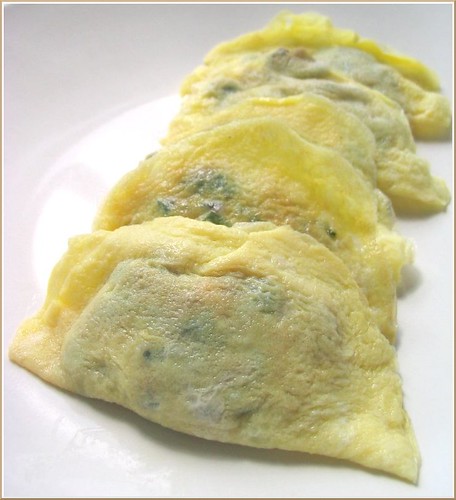
Back in Shanghai, my relatives would make these egg dumplings for a special occasion or big family get together. A thin layer of beaten egg rather than a flour dough is used as a wrapper; think of it like a mini omelet. Traditionally, a wok or a ladle is used to make the egg wrapper and it's a very delicate and time consuming process.

I used way too much egg for the first wrapper and ended up with a thick egg taco. The next few wrappers spread into blobs that resembled various landmasses rather than circles. Many wrappers tore when I tried to close the dumpling, some exploded with filling. After botching almost a dozen dumplings, I finally got the hang of it. A few hours later, I made a little over two dozen dumplings. They were delicious but I would not recommend making them; they just aren't worth the time and effort.

Notes:
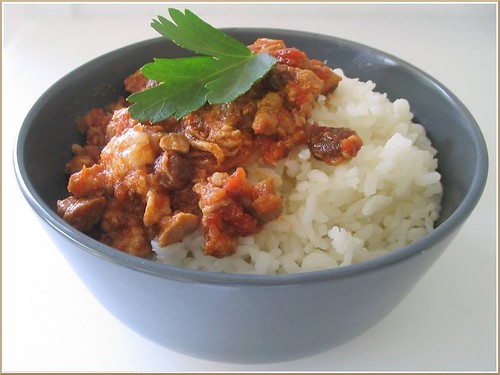
- The recipe makes a lot of filling, enough for a full dumpling dough recipe: (3 C flour, 1 C water, 1 tsp salt). Any leftover filling can be stir fried and eaten with rice.
- The mushrooms are cooked first to bring out their flavor and the chives are cooked a bit to wilt them down.

Pork, Chive, and Mushroom Filling

3/4 lb ground pork
3 C packed chopped Chinese chives/leek
1/2 C chopped rehydrated dried shiitake mushrooms
2 Tbsp soy sauce
2 Tbsp Shao hsing rice wine
1 egg
1 Tbsp cornstarch
1 tsp grated ginger
1/4 tsp white pepper
1/2 tsp sugar

Heat 1 tsp of vegetable oil in a nonstick skillet over medium high heat. Add the shiitake mushrooms and stir fry for a minute, then add the chives and cook just until the chives start to wilt (do not cook them fully). Set aside to cool.

Mix everything together to make the filling.

Egg Dumplings
1/2 of the pork and chive recipe
4 eggs beaten with some salt and 4 Tbsp of water/milk
Vegetable oil

Heat 1/2 tsp of vegetable oil in a small nonstick skillet or wok over medium or medium low heat. Add only a tablespoon (resist the temptation to add more) of the beaten egg mixture to the skillet and tilt the egg mixture around to form a very thin circular wrapper about 3 to 3 1/2 inches in diameter. The skillet should be hot enough so that the egg slightly sizzles when it hits the pan. The pan is too hot if the egg sizzles loudly and sets immediately as it hits the pan before you can finish swirl the wrapper. I found that the best technique is a combination of tilting the pan and using the back of the tablespoon to push the egg out to make a circle.

Add a mounded teaspoon of filling to the center of the egg wrapper and use a spatula to flip half of the wrapper over the filling. Press around the crescent edges to seal the filling in as the egg fully cooks. Allow the dumpling to cook for a few more seconds in the pan then set aside. At this point the filling is not cooked. Repeat with making the rest of the dumplings. 4 beaten eggs will make around 26 dumplings.

Traditionally, the dumplings are fully cooked in hot pot or soup but I'm sure you can also steam them to fully cook the filling. I gently boiled them in some chicken stock for about 10 minutes to cook them through.


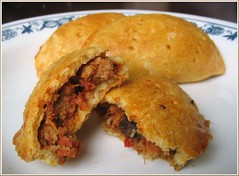
I ended up making way too much filling because I drew the line at 4 eggs, so I made a flour dough to make stuffed cakes. The dough is a basic dumpling/potsticker wrapper dough. The stuffed cakes are very similar to a potsticker but are circular and bigger.

Stuffed Cakes

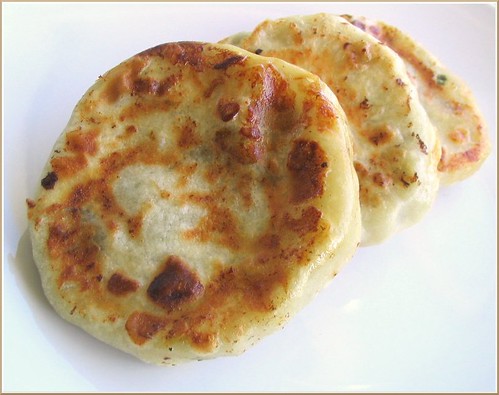
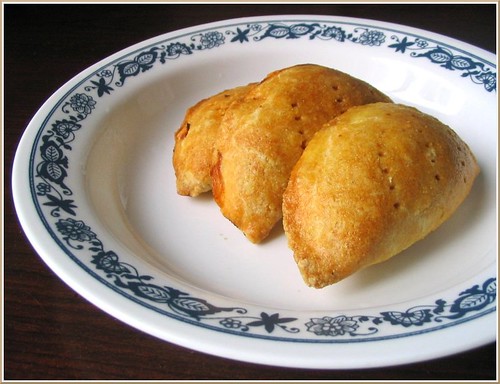
Pork, Chive, and Mushroom Stuffed Cakes
Dough (halved basic potsticker wrapper
1 1/2 C flour
1/2 C cold water
1/2 tsp salt


Mix the flour, salt, and water together and form a uniform smooth dough.

Let the dough rest for 30 minutes.

Divide the dough in half and then each half into 4 - 5 pieces. I got about 10 stuffed cakes from this recipe.

Roll a piece of dough into a circle that's about 4 - 5 inches in diameter. Keep the wrapper thicker in the middle and thinner towards the edges.

Add a mounded tablespoon of filling to the center of the wrapper. I wanted to stuff these cakes as full as possible.

Gather up all the edges and pinch close. Then flatten the cake gently into a patty. Set aside on a flour lined sheet and continue to make the rest. Dust off excess flour before cooking. You can also freeze these cakes; first freeze them on a tray then transfer them to a zipper lock bag.

Heat 2 tsp of vegetable oil in a nonstick skillet over medium heat. Pan fry the cakes until both sides are golden brown. Then add 1/4 C of water to the skillet, cover, turn the heat down to low, and steam for 10 minutes. If the pan gets too dry, add another tablespoon of water.

After 10 minutes remove the cover and turn the heat up to medium high. Boil off any remaining water and recrisp both sides.


More dumpling recipes:
Pork and Cabbage Potstickers
Shrimp and Edamame Dumplings (Har Gau)
Sticky Rice Siu Mai

This month's WTSIM is hosted by Johanna of The Passionate Cook. Be sure to check the roundup for more great dumpling recipes.

Wednesday, June 27, 2007

Bagels: Daring Bakers June


June marks my first Daring Baker's Challenge and this month, Jenny of All Things Edible and Freya of Writing at the Kitchen Table chose Real Honest Jewish Purist's Bagels. I've made a few yeasted baked goods before so I was fairly comfortable with the idea of making bagels. I was ready to break out the KitchenAid for another bout of effortless kneading. That is until I found out we had to knead by hand. To be honest I don't really know how to properly knead by hand so it was definitely a little intimidating. I'm extremely reliant on my KitchenAid, perhaps too reliant. It was something I saved up for and bought many years ago as a teenager and is my most prized kitchen possession. But knowing how to knead by hand is definitely a good skill to know for a baker so I left the beloved mixer alone in the corner and rolled up my sleeves to attack the dough. I made half the recipe because I was afraid of having too many bagels. I'm a little glad I only made half the recipe because the dough was quite stiff and definitely gave me an upper body workout with all the kneading. In fact my right side was even sore the next day! The downside of only making half the recipe is that the bagels were oh soooo delicious and unfortunately making half the recipe meant only 8 bagels, which were quickly devoured in 1.5 days.

The recipe can be found here.

The rules this month:
- Toppings should be savory and nothing should be added to the bagel dough itself.
- Bagels can be filled with anything your heart desires. They tasted delicious plain so I didn't add anything.

Some recipe notes:
Ingredients
I used King Arthur's bread flour, instant yeast, clover honey in the dough, and sugar in the water. Next time, I will only use 1 packet of yeast (2 1/4 tsp) for 4 C of bread flour rather than the 2 Tbsp stated in the recipe.

Kneading
I kneaded for about 15 minutes and left it alone to rise. Then I reread the recipe and it said the dough should be smooth and elastic. My dough wasn't smooth or elastic so I was worried I underkneaded. But I forged ahead with the rest of the recipe and luckily they turned out okay.

Rising
The dough rose extremely quickly. In order to avoid bready bagels, you want to really punch down the dough. I mean REALLY punch it down.

Making the bagels
I used the hole method to make the bagels (making a disc then poking a hole in the middle then stretching it out a little for an even bagel). I was afraid the "snake" method would uncoil in the water. Don't worry if the bagels aren't very pretty, mine were all uneven and lumpy.

Floaters or sinkers?
Although the recipe stated that the bagels should at first sink in the simmering water then float, like many other Daring Bakers, all of my bagels floated immediately as they hit the water.

Toppings
In the end I made five different bagels: plain, sesame seed, poppy seed, Parmesan, and pizza (leftover tomato sauce and some mozzarella). After the initial 25 minutes in the oven, I noticed the pizza ones were getting a little dark so I move the sheet from the middle rack to the lower middle rack (I didn't flip the bagels over). I used pretoasted sesame seeds on the bagels and I was afraid they would burn in the oven but they turned out fine.


You can visit all my fellow Daring Bakers (links on the righthand sidebar) and see what toppings they put on their bagels.

Tuesday, June 26, 2007

Daikon Cakes

Daikon Cakes
Daikon is a large white radish that's very popular in East Asian cuisine. It can be simmered, dried, pickled, or eaten raw. I love the taste and crispness of raw daikon so I wanted to preserve that crunch and raw bite in these cakes. In making this recipe, I borrowed elements from latkes and crabcakes. The first time I experimented with this idea, I made the cakes thin like pancakes and by the time the outside finished frying, the insides were too cooked and had lost that raw crunch. This time I made the cakes thicker, more like crabcakes, and dredged the outside in some panko for an extra crispy exterior.

Notes:
- Although this dish has the same name as the other daikon cake (luo buo gao), the two cakes are very different.
- The egg and flour serve as binders to hold the daikon together. The first time I made this I used a tiny bit of batter made from flour and water.
- The daikon is first salted to dry out excess moisture.
- You can probably substitute jicama for daikon in this recipe but I haven't tried this.

Crispy and Crunchy Daikon Cakes
3 C packed coarsely grated daikon radish
3/4 tsp salt
2 green onions, minced
1 egg beaten
2 Tbsp flour
1 tsp sesame oil
1/4 tsp white pepper
About 1/2 C panko bread crumbs
Vegetable oil for frying

Coarsely grate the daikon radish and mix with 3/4 tsp of salt. Let this sit in a bowl or colander for 30 minutes.

After the 30 minutes, squeeze the water out of the daikon with your hands. You'll want the daikon really dry.

Mix the daikon with minced green onion, beaten egg, flour, sesame oil, and white pepper. Take 1/3 C of the mixture and form cakes that are about 1/2 in thick. You should get 5 or 6 cakes.

Scatter some panko on a plate and bread the top and bottom of each cake with a layer of panko.

Heat 2 tsp of vegetable oil in a nonstick skillet over medium heat. Panfry the cakes until the bottoms are golden brown. Flip the cakes over, add another 2 tsp of oil, and continue to panfry until the second side is golden brown. Serve with soy sauce if desired.


Links:
My other daikon cake recipe - these are often served at dimsum.

This will be my entry for Weekend Herb Blogging. This week's WHB is hosted by creator, Kalyn of Kalyn's Kitchen. Be sure to check out the roundup on Sunday/Monday.

Thursday, June 21, 2007

Carbonnade

Carbonnade

June isn't exactly the typical season for stews but a week ago the weather was a bit chilly, chilly for June that is, (like my graduation) and I had been eyeing this carbonnade recipe for quite some time. Carbonnade is a hearty Belgian stew that centers around three main ingredients: beef, beer, and onions. The original Cook's Illustrated recipe recommends using a traditional Belgian ale or another dark ale or beer like Chimay, Newcastle Brown Ale, Anchor Steam, and Samuel Smith Taddy Porter. I only had Guiness at home, which the folks at CI said could make for a slightly bitter stew. So to balance this bitterness, I opted to use some sweet Vidalia onions rather than yellow onions. The stew was simple to make but really delicious and rich. We ate it over rice but you can also serve it over egg noodles or potatoes. Mmm... meat and rice, my type of meal.

Notes:
- If you can't get top blade steaks you can substitute a chuck roast.
- Recommended ales: Chimay, Newcastle Brown Ale, Anchor Steam, and Samuel Smith Taddy Porter
- If you are using one of the four recommended beers, use yellow onions, using red or white onions with those beers can make the stew a bit too sweet.
- If you only have Guiness Stout like me, use sweeter red or white onions to balance the bitterness.
- Slice half the onions into 1/4 in slices and the other half into 1/8 in slices. The thinner slices will melt into the stew but the thicker slices will stick around and melt in your mouth.

Carbonnade a la Flamande
Adapted from Cook's Illustrated

3 - 3 1/2 lb blade steak, trimmed of gristle and fat then cut into 1 inch pieces
2 lbs yellow onions, 3 medium or 2 large onions (see note about slicing)
2 cloves of garlic, minced or pressed
3 Tbsp of AP flour
1 C chicken broth
1 12 oz. bottle of one of the recommended Belgian ales
Bouquet Garni: 4 - 6 sprigs of parsley, 3 - 4 sprigs of thyme, 2 bay leaves tied together with twine
1 Tbsp red wine vinegar or cider vinegar
salt and pepper to taste
3 Tbsp vegetable oil

Dry beef with some paper towels and season with salt and pepper. Heat 2 tsp of oil over medium high heat in a Dutch oven. When the oil is barely beginning to smoke add 1/3 of the beef. Cook the beef on the first side, without moving until browned, about 2 - 3 minutes. Then use tongs and flip the beef pieces over and brown on the second side. Transfer to a bowl, add more oil and repeat with half of the remaining beef. If the browned bits on the bottom of the pan are getting too dark, add some chicken broth, scrape up the brown bits, then pour this liquid into the bowl with the beef. Add more oil, and brown the remaining beef.

Reduce the heat to medium and add another tbsp of oil into the Dutch oven. Add the onions and cook until they are lightly browned. Add the flour and garlic. Cook until the flour is lightly browned, about 2 minutes. Add the chicken broth, beer, and vinegar. Scrape up any additional browned bits, then add the beef and bouquet. I usually add salt and pepper now so the beef will pick up flavor as it cooks but I don't add too much salt since the stew will reduce a little and the flavors will concentrate. Salt to taste after cooking.

Increase the heat and bring the contents of the pot back up to a boil then lower the heat to a bare simmer. Simmer over really low heat for about 2 - 3 hours, or until the beef is tender. Discard the bouquet and salt to taste. Sprinkle with a bit of fresh parlsey and serve over rice or egg noodles or alongside potatoes.

Tuesday, June 19, 2007

Green Tea Truffles

Green Tea Truffles

In my previous green tea confection post, Wandering Chopsticks suggested I make green tea truffles as a way to use up my aging matcha. It was a brilliant idea and what better time to make them since June is National Candy Month. The truffle center is a white chocolate ganache flavored with green tea. White chocolate is a powerful flavor so it is the first thing that you taste but as the truffle melts in your mouth the floral flavors of the green tea slowly emerges. The truffle is then coated with a shell of white, dark, or green chocolate (white chocolate with more matcha mixed in). Finally it can be rolled in some matcha powder or cocoa powder, or drizzled with a different colored chocolate. The truffles covered in dark chocolate are especially fun because people will be surprised to see a green center when they bite into the chocolate and find out it is green tea and not mint.

This was my first time making truffles and tempering chocolate seemed very daunting. I was going about it blindly since I didn’t have a thermometer to monitor the temperature of the chocolate so it didn’t work. Properly tempered chocolate has a shiny appearance, a crisp bite, and snaps when you break it. If chocolate is not tempered, it is soft, crumbly, dull, and melts too easily. The truffle coated with dark chocolate looks a bit dull. Since I was working with only 1 ounce of chocolate it wasn’t a big deal that my chocolate wasn’t tempered. Plus if you coat them in powder, no one will know. :)

Green Tea Truffles

Notes:
- This was an experiment so the quantities are quite small but it can be doubled. The original recipe makes a dozen truffles.
- In the recipe I specified to use 1 teaspoon of matcha but taste the mixture before chilling it to see if you wish to add more.
- If you choose to coat the center in green chocolate and roll it in matcha you might want to use a little less matcha in the filling.
- The truffles are best served a little chilled, at room temp the centers are a bit too soft.

Green Tea Truffles
Ganache Filling
4 oz. white chocolate, roughly chopped
2 Tbsp heavy whipping cream
1 tsp matcha or more (to taste)

Outer Shell
1 oz. white chocolate, roughly chopped (covers 6 truffles)
1 oz. dark chocolate, roughly chopped (covers 6 truffles)
Matcha and or cocoa powder for rolling


For the filling, add the roughly chopped chocolate, whipping cream, and matcha in a heat proof bowl and melt over a double boiler or in the microwave heating in short bursts.

Taste the filling first to see if it needs more matcha, then chill it for a few hours in the fridge before using.

Using a melon baller or teaspoon, scoop mounded spoonfuls of the ganache mixture onto a parchment lined baking sheet. You can also wear some gloves and use your hands to roll the drops into uniform balls. You should end up with around 11 – 12.

Chill the ganache balls again for a few hours in the fridge or 30 minutes in the freezer.

Melt the chocolate for the outer shell. There are two ways to coat the truffles, you can either use a toothpick and dip each ball into the melted chocolate, or you can wear a pair of gloves, add some melted chocolate to the palm of a gloved hand, and roll each ball in your palm. Set each coated truffle onto the same parchment lined baking sheet. Let the chocolate harden a little then you can roll it in cocoa powder or matcha powder (and dust off the excess).


Here are some combinations you can do:
White chocolate shell + matcha powder
Green chocolate shell + matcha powder
Dark chocolate shell + cocoa powder
Dark chocolate shell + white or green drizzles
White or green chocolate shell + dark chocolate drizzles


Links:
This will be my entry for I Heart Candy hosted by YumSugar

Interested in more in-depth truffle making guides?
Cooking engineer has a great guide for chocolate truffles and tempering chocolate
I wish I found this sooner! Helen makes gorgeous truffles!


Sunday, June 17, 2007

Baked Salmon ala Mayonnaise

Baked Salmon ala Mayonnaise

Steven first introduced me to this salmon dish many years ago during the teenage period when I hated mayo. I definitely raised my eyebrow when I heard mayo and salmon in the same sentence. In my mind, why ruin a perfectly good piece of fish by slathering it with something like mayonnaise? Well after I reluctantly tried a bite of the salmon, it wasn’t bad. When I recently bought some Copper River salmon, this was the first dish Steven asked me to make. Go figure. I'm not sure how common this particular salmon preparation is but I'm guessing this recipe probably isn’t everyone’s cup of tea since lots of people dislike mayonnaise. The main purpose of the mayo is to keep the salmon moist so I don’t use too much. After baking, the mayo is no longer goopy and mayo-like, instead it forms a light and tasty crust on top of the salmon. The original recipe used only salt, pepper, and mayo to top the salmon. I had to make it more interesting so I added some sun-dried tomatoes, lemon zest, and Dijon mustard.

Baked Salmon ala Sun-dried Tomato and Lemon Mayonnaise

1 lb salmon fillet
2 Tbsp mayonnaise
1 Tbsp sun-dried tomatoes, rinsed of oil and minced
Zest from half a lemon, about 1 tsp
1 tsp of Dijon mustard
Salt and pepper
Olive oil

Take the salmon out of the fridge 30 minutes to an hour before cooking to let it warm up a bit.

Adjust an oven rack to the upper middle position. Line a baking pan with a sheet of foil, coat the foil with some olive oil, and lay the fillet on the pan skin side down. Salt and pepper the top of the salmon.

In a small bowl, mix together the mayo, mustard, sun-dried tomatoes, and lemon zest. Using the back of a spoon or a spatula, coat the top and sides of the fillet with an even layer of the mayo mixture.

Broil on the upper middle rack until the top is golden brown, a few minutes. Rotate the pan 180 degrees halfway through so the crust browns evenly. After broiling, if a paring knife cannot be inserted cleanly into the fish, or if it does not flake, then turn off the broiler, and return the fish to a 400ºF oven and finish baking the salmon for a few more minutes.

Saturday, June 16, 2007

Green Bean Stir Fry

Green Beans

I pulled this recipe out of the archives because there was no photo to go with it (well there was but it was so awful I was too embarrassed to show it). Now I have an updated photo but I still can't think of a better name for the dish. Steven calls them "squeaky beans" because they're cooked so that they are still crisp and squeak when you eat them. With additions like garlic, spicy sauce, and dried shrimp, these beans are really flavorful, definitely not your average bland and blanched green bean.

(From the recipe archives)

Green Beans Stir Fry
1 lb green beans, ends trimmed
2 Tbsp finely diced Chinese dried radish or zha cai
2 - 3 garlic cloves, minced or pressed
2 tsp small dried shrimp, chopped
1 tsp of Asian spicy red pepper sauce (I use the brand Lao Gan Ma) or substitute with some red pepper flakes or other hot sauce, adjust to your tastes or omit entirely
2 Tbsp soy sauce
1 Tbsp rice vinegar
1 tsp packed brown sugar
2 tsp vegetable oil
salt and pepper

Heat 2 tsp of vegetable oil in a wok or skillet over medium high heat. Add dried shrimp and dried radish and fry in oil for 30 seconds to a minute.

Add green beans, garlic, and red pepper sauce (if using) and stir fry for a minute.

Add soy sauce, brown sugar, and vinegar and cook covered until the beans are to your liking.

I like my beans crunchy but if you prefer beans to be more tender, cook them covered for longer and if the pan gets too dry add a scant tablespoon of water.

Serves 3 - 4

Tuesday, June 12, 2007

Pizza

Pizza

Once upon a time, I tried to make pizza... on a cookie sheet... in a 350 degree oven. To put it bluntly, the end result was bad. The "crust" ended up being about an inch thick, soggy where it touched the sauce, soft and flabby on the bottom like it was steamed rather than baked. It barely qualified as a crust, I probably can't even use that word to describe this monstrosity. I think I found on the recipe, which seemed fairly legitimate at the time, on the Food Network being pass off as making a decent pizza. It was completely ridiculous! Now I know better; now I know that high heat is critical for a crisp crust and a baking stone really helps. I'm not crazy passionate enough to tamper with my oven to get it to go all the way up to 800 degrees. I don't want to burn my house down thank you very much. So Mr. Varasano might disagree with me, but I think 500 degrees is perfectly fine for a decent homemade pizza, plus I don't like my pizzas "charred."

Steven always hangs out with me in the kitchen when I make pizza. Whether he's there to keep me company or to steal little bits of cheese or Italian sausage when I'm not looking, I'm not really sure, though I suspect it's a bit of both. Homemade pizza is always really rewarding. We can choose what toppings and just how much of them we want to put on and how thin or thick we want the crust so our pizzas are always just the way we like them. And the pizza bakes really quickly so it's really entertaining to see it transform in the oven in a matter of minutes.

Notes:
- I included 2 dough recipes. The first is the regular pizza dough from Cook's Illustrated. The second is also from Cook's Illustrated but it's the pissaladiere dough recipe. You'll notice that the first recipe uses 4 cups of flour and 1 3/4 cups of water while the second uses 4 cups of flour and 2 cups of water. Since the second recipe has more water it makes a crispier crust. I experimented with both and personally liked the pissaladiere dough more. I recommend trying both out and seeing which you prefer. You can always opt to make a half recipe to test it out.
- I usually divide the dough in half, freeze one portion and make 2 medium pizzas out of the second portion (smaller pieces of dough are easier to work with). This is plenty for both Steven, a voracious pizza eater, and I, with a bit leftover.

Pizza Dough (Yields 3 - 4 medium pizzas or 2 larges, serves 4 - 6)
Adapted from Cook's Illustrated

4 C bread flour (plus more for dusting)
1 3/4 C warm water, about 110ºF
1 package instant yeast, about 2 1/4 tsp
2 Tbsp olive oil (and more for hands)
2 tsp salt

If you are using instant yeast you can skip the proofing, but if you are using active dry yeast, proof the yeast in the warm water for 10 minutes then proceed with making the dough.

Mix the flour with yeast and salt in the bowl of a stand mixer. Pour in the warm water and olive oil and use the paddle attachment to bring the dough together at low speed. Then switch to the dough hook and knead for 5 minutes, until the dough is smooth and elastic. The dough will be a little sticky but if it's too sticky add some more flour, about a tablespoon at a time. The dough can also be made in a food processor (in a matter of seconds) or by hand.

Place the dough in a lightly oiled bowl and cover with plastic wrap. Let it rise until doubled, about 1 1/2 to 2 hours.

Gently turn the dough out onto a lightly floured work surface. I find it's easiest to work with medium sized pizzas so either divide the dough into 3 or 4 pieces (or alternatively you can make 2 large pizzas).

One trick I learned when making pissaladiere, is to oil your hands instead of flour them. First stretch out the dough into the desired shape then use your palms and press out the dough to stretch and flatten it more, at the same time you press olive oil into the dough for a crispy crust. It also saves you the step of having to brush olive oil on the dough.

I don't like to roll out pizza dough because it squeezes out all the bubbles, I like the bubbles. Instead I stretch out the dough with my hands or hang it over my fists and gently stretch out the dough while gravity helps out. If the dough resists, let it rest for about 10 minutes, then stretch it some more. Then I coat my palms in some olive oil and press the dough outwards to get it even thinner.

Remember to preheat your pizza stone to 500ºF or the highest temp your oven will go 30 minutes before you want to bake your pizza.

~~

Pissaladiere Dough - Extra Crispy Pizza Dough (Yields 3 - 4 medium pizzas, serves 4 - 6)

4 C bread flour
2 tsp instant yeast, you can probably just use a packet since that's 2 1/4 tsp
2 tsp salt
2 Tbsp olive oil
2 C warm water, about 110ºF

If you are using instant yeast you can skip the proofing, but if you are using active dry yeast, proof the yeast in the warm water for 10 minutes then proceed with making the dough.

The dough is easiest made in the food processor because it is very wet and sticky but you can also use a stand mixer or mix it by hand.

Add the flour, yeast, and salt to the food processor and pulse a few times to combine. With the motor running, add the oil then steadily pour in the water and process until the dough comes together in a ball, about 15 seconds. The plastic dough blade works best for the dough, but I only have a mini food processor and a metal blade so I have to make the dough in batches then combine the pieces together.

Flour your hands and dust a work surface and knead the dough a bit. But since this is a very wet dough, it's more of a slap/push than a gutsy knead. Shape the dough into a ball. The dough will be wet, sticky. It will be pretty sticky and stick to your hands a bit, but not a lot, and very slack.

Place the dough in a lightly oil a bowl and cover with plastic wrap. Let it rise in a warm place until doubled, about 1 hour to 1 1/2 hours.

When the dough has doubled, gently turn it out of the container. Cut it into 3 or 4 even pieces and form each piece into a ball by gently picking the edges of the dough together into a pouch and pinch to close. Roll the dough ball over, seam side down. Cup the dough with both hands and push the dough around to form a taut ball. Repeat for the remaining pieces. Brush each piece lightly with olive oil, cover with plastic wrap, and set aside for 10 minutes for the second rise.

Coat your hand in oil instead of flour. Pick up the dough and stretch the dough into a rough circle. Place the dough on a sheet of parchment then using the palm of your hand, push the dough out into an circle. The surface should be evenly flat but leave a small lip around the dough for the crust.

~~

Quick Tomato Sauce (makes about 3 cups of sauce, enough for the full dough recipe)

1 28 oz. can diced or whole tomatoes, pureed in a FP or blender or put through a food mill
2 tbsp olive oil
2 - 4 garlic cloves, minced or pressed
salt and pepper
a few pinches of Italian herb mix, crushed between your fingers
About 1/2 C fresh basil leaves, chopped or chiffonade

Add garlic and olive oil to a (unheated) saucepan or skillet and heat them up together over medium heat. When the garlic starts sizzling and smells fragrant (don't burn it), add the tomatoes, pepper, and some italian herb mix. Simmer uncovered until the sauce is thickened.

Season to taste with salt and stir in the basil off heat.

~~
Pizza

Italian Sausage and Pepper Pizza (makes 2 medium pizzas)
Half a pizza dough recipe
Half the quick tomato sauce recipe, about 1 1/2 C
1/2 red onion, sliced
3 Italian sausages, removed from casing
1 medium red, orange, or yellow bell pepper, sliced
About 1 C shredded mozzarella

Preheat the pizza stone and oven to 500ºF or the highest your oven will go. Remember to place the stone into a cold oven and heat them up together.

Brown the Italian sausages in a skillet over medium heat until cooked through (important), breaking into bite size pieces.

Divide the dough in half. Stretch out and flatten the crust. Crack some pepper on the dough and spread about 3/4 C of tomato sauce onto it.

I like to put the sausage pieces and onion slices on first and hide these toppings under the cheese so they don't burn. Then put the peppers on top so they can roast in the oven.

Bake until the crust is golden brown and the cheese is spotty and melted, about 5 to 10 minutes depending on your oven. Keep an eye on it and remove it when you think it looks good.


Thursday, June 7, 2007

Green Tea Cheesecake White Chocolate Brownie

Green Tea White Chocolate Brownie

Green tea is one of my favorite flavors for sweets, from cakes, cheesecakes, puddings, ice cream (I can't tell you how much I adore green tea mochi ice cream), to drinks like milkshakes and frappucinos (I would be drinking this stuff 24/7 if only it wasn't so expensive and not to mention fattening). Up until a few years ago, its use as a dessert flavor was fairly localized to Asia but now it's growing in popularity around the world, working its way into very French desserts like macarons and madeleines. I received my bag of green tea (matcha) powder a long time ago from Steven's parents who brought it back from Taiwan. It is absolutely precious to me so rather than using it, the bag of matcha sat untouched safely in the pantry. A few days ago I looked at the bag again, and although it was entirely in Japanese, from what I could understand it expired last month. Ack! Now I need to use up the powder and there's no excuse for letting it sit around, so stay tuned for a flurry of green tea sweets.

I never understood blondies. It seems only natural that if brownies are made with chocolate, then blondies should be made with white chocolate. Instead, blondies are more like bar cookies made with brown sugar and chocolate chips rather than melted white chocolate. So this leaves the poor white chocolate brownie without a proper name. It's a tragedy. :( As a result, this dessert has an abnormally long name, but I can't think of anything better. This will be my entry for Myriam's 2nd Browniebabe of the Month. Helen and Meeta also made white chocolate brownies, we must all be on the same Daring Baker vibe.

Notes:
- Matcha powder can be quite expensive especially the high quality stuff used for tea ceremonies, baking quality matcha is often more affordable.
- The green tea cheesecake swirls can be omitted for a regular white chocolate brownie/blondie
- The amount of matcha you need will depend on its strength. Since mine is really weak (perhaps due to the expiration date), I had to use almost 2 tablespoons in the cheesecake filling, but this is highly unusual. Usually 1 to 2 teaspoons of matcha is enough so start out with a little bit and taste it.
- The brownies were almost a tad too dense (I usually really love fudgy brownies) but next time I will add 1/4 tsp of baking powder to the batter.
- When I made these I was expecting something identical to a regular brownie but with white chocolate flavor. However, the texture of these brownies was very different from what I was expecting, I can't put my finger on it exactly. I think it might have to do with the different proportions of cocoa butter and other stuff in white chocolate vs. semi/bittersweet. They also didn't have a crust on top.

Green Tea Cream Cheese Swirl White Chocolate Brownie

Green Tea White Chocolate BrownieBrownie base
8 Tbsp butter (1 stick), cut into 1-in pieces
5 oz. white chocolate, chopped
2 eggs
5 Tbsp sugar
1 tsp vanilla
3/4 C flour

Cheesecake swirl
8 oz bar of cream cheese, room temp
1 egg
3 Tbsp sugar
2 tsp green tea/matcha powder
About 2 tsp of water, hot but not boiling

Preheat the oven to 325ºF.

Mix the green tea powder with a bit of hot water to form a paste. Mix the cream cheese, egg, and green tea paste until smooth. Taste a bit and see if it's strong enough.

Melt the butter with the white chocolate. Mix in the sugar, eggs, vanilla, and flour (and baking powder if you want to experiment with it). Whisk until smooth but do not over mix.

Line a 8 x 8 square baking dish with a sheet of foil (with overhang for easy lifting) or grease and flour it. Pour in half of the white chocolate batter. Then drop half of the cream cheese mixture on top in spoonfuls. Top the batter with the rest of the white chocolate brownie batter, then finally add the remaining half of the cream cheese mixture on top. Use a knife and swirl the brownie and cream cheese together to create a marbled pattern.

Bake the brownies at 325ºF for 40 - 45 minutes, or until a toothpick inserted in the center comes out with moist crumbs. The center should be almost set. You don't want the toothpick to come out clean because that would mean the brownies have overbaked. Cool in the pan for 5 then lift the brownies out and cool to room temperature. They're best served cold so chill them in the fridge for about 3 hours.


Tuesday, June 5, 2007

Pork Picadillo Empanadas

Pork Picadillo Empanadas

Originally I wanted to bake something for Meeta's birthday, then the plan switched to making ricotta pancakes; the idea being a "virtual" birthday breakfast. I used an Everyday Food recipe and while they had the right idea, the recipe was seriously lacking. I definitely couldn't share a dish I wasn't proud of for Meeta's event so I wanted to make something else. Since the Monthly Mingle is a party theme, I finally went with some savory empanadas for an snack/appetizer. Happy Birthday Meeta, I hope you had a great day. :)

Pork Picadillo EmpanadasNotes:
- I'm not really sure what the baking powder did, made the crust lighter I suppose. Next time I will omit it and see what happens.
- Some recipes didn't call for baking powder but used vinegar instead. I'm not sure what that would do, maybe make the crust tender also?
- I didn't really figure out how to crimp the edges of the empanada, like Deb, her's are so gorgeous. Maybe next time I'll figure it out.
- I think I may not have rolled out the dough thin enough. If you roll out the wrappers to 1/8-in thick I suspect you may be able to get more empanadas out of the recipe.

Pork Picadillo Empanadas
Filling
About 2 C pork picadillo

Dough
Adapted from Mark Bittman's The Best Recipes in the World

1 3/4 C flour
1/4 C finely ground cornmeal (original recipe called for masa harina which I didn't have)
1/2 tsp baking powder
1 tsp salt
1 egg, lightly beaten
6 tbsp butter, cold
3 – 5 tbsp milk
Egg wash: 1 egg lightly beaten

Mix the flour, cornmeal, salt, and baking powder in a bowl. Using a food processor, pastry blender, or two forks, cut the butter into the dry ingredients until it resembles coarse meal and the butter pieces are no bigger than a pea.

In the center of the dry ingredients, make a well and pour in the beaten egg and 3 tbsp of milk. Bring the dough together, if it is too dry and resists, add some more milk.

Turn the mixture onto a work surface and gently knead (only enough to bring it together, don't overwork the dough) and bring the dough into a cohesive mass. Cover with plastic wrap and refrigerate for at least an hour.

Preheat the oven to 375ºF.

Divide the dough in half and each half into 8 or 9 even pieces. I got about 18 4-in wrappers out of the dough. Roll each piece out into about a 4in wrapper. Plop about a mounded tablespoon of filling in the center. Fold and seal the crescent, and crimp the edges with a fork (I skipped this) or crimp it in a decorative way (couldn't figure out how to do this).

Brush each empanada with some beaten egg and poke some holes on top for the steam to escape. Bake at 375ºF for about 30 minutes, or until the tops are golden brown.

Pork Picadillo

Pork Picadillo

A year’s worth of Everyday Food has been piling up on my bookcase. When I received my first issue, most of the recipes in the magazine didn't suit my tastes. So every subsequent month, I would simply stick the latest issue on a shelf not bothering to look inside. But over the last year my tastes have definitely changed and the range of foods and dishes that appeal to me have widened greatly. Recently I needed something to read on the bus so I I brought the June issue with me. I was casually flipping through the pages expecting nothing to interest me but to my surprise I liked quite a few recipe and dog eared a few pages. Now I'm slowly working my way back, reading all the magazines that I had previously ignored. In this latest edition, I saw a recipe for pork picadillo that looked pretty good. It was really tasty over rice and I used the fillings in some empanadas that I made for Meeta's Birthday Bash Monthly Mingle.

Notes:
- Since I didn’t have ancho chili powder, I used 1 tsp of regular chili powder + 1/2 tsp of smoked paprika
- I made a few changes to the recipe but in the end I felt like it could use a bit more spice. Next time I will up the chili powder to 2 teaspoons. In retrospect, a teaspoon of chili powder hardly seems enough to flavor 3 pounds of meat. But perhaps high quality ancho chili powder would have done the job.
- The recipe makes a lot, about 6 - 8 cups, but it freezes well.
- Other uses include: in burritos, nachos, tacos, on baked potatoes, and empanadas

Pork (or Beef) Picadillo
Adapted from Everyday Food

3 lb ground pork (or lean ground beef)
1 medium onion, diced
1 28 oz. can of diced tomatoes
2 chiptole chilies (in adobo sauce), minced
1 tsp of the adobo sauce from the chiptole peppers
3 garlic cloves, minced or pressed
1 tsp ancho chili power (or regular chili powder + smoked paprika)
1/2 tsp ground cumin (I used 1 tsp whole cumin and ground it)
1/2 tsp cinnamon
1 - 2 bay leaves (depending on the size and potency)
1/2 tsp black pepper (or more to taste)
1/2 C raisins
Olive oil
Salt to taste

Optional: chopped green olives
Toppings: chopped cilantro and/or toasted almonds

Heat 1 tbsp of olive oil in a dutch oven and brown half of the ground meat, remove, add more oil to the pan, and brown the second half. Drain the fat if you’re using ground beef, pork is pretty lean so draining is unnecessary.

Pour out any accumulated fat if using beef. Add another tbsp of olive oil and add the chili powder and cumin. Bloom the spices in the oil for a few seconds then add the onions and cook until softened. Then add the garlic, and cook until fragrant, about 30 seconds.

Add the browned meat, tomatoes, chopped chilies, bay leaf, cinnamon, and ground black pepper to the pan. Add some salt but leave it a little on undersalted because the flavors will concentrate as it reduces, salt to taste after it finishes cooking.

Simmer partly covered for about 45 minutes. At the halfway point if it's still looking too liquidy, simmer uncovered for the rest of the time. 10 minutes before the dish is done, soak the raisins in some hot water. I did this to leech out some of the sugar, otherwise they're too sweet for me, and to get rid of the gross sticky coating on the outside. Soak them for about 5 minutes, drain, and squeeze the excess water out. Off heat, stir in the raisins and fish out the bay leaves.

Serve over rice with some chopped cilantro and/or chopped toasted almonds on top.

Friday, June 1, 2007

Pissaladiere

Pissaladiere

Pissaladiere, a pizza-like tart of onions, olives, and anchovies, is a popular street food of Nice, a city in the Provence region of France. Some recipes call for a puff pastry crust, which can be too flabby and greasy, or a pate brisee, which can be too dense. This Cook’s Illustrated recipe builds the tart on a thin pizza-like crust that has a crisp, crackery exterior and a chewy interior. Often times, recipes will call for too much anchovies or olives and one ingredient will overpower the rest of the flavors but here, the saltiness of the anchovies, slight bitterness of the olives, and the sweetness of the onions are well balanced.

Notes:
- Chopping the anchovies really spreads out their flavor and prevents the tart from being too fishy. I like anchovies so I added a few whole fillets on top but getting a bite that contained whole anchovy was overly salty so if you really love anchovies, I would suggest chopping the extra rather than laying them on top.
- Use fresh thyme, since you’re going through all this trouble, don’t bother with the dried stuff.
- The onions can be made a day ahead and refrigerated.
- Bread machine, rapid rise, perfect rise, and quick rise yeast are all instant yeasts.

Pissaladiere/Provencal Pizza
Adapted from Cook's Illustrated

Dough
2 C bread flour
1 tsp instant or active dry yeast (if using active dry remember to proof the yeast)
1 tsp salt
1 Tbsp olive oil
1 C warm water, about 110ºF

Caramelized onions
2 Tbsp olive oil
Roughly 1 1/2 lbs of yellow onions (about 3 large onions), sliced 1/4 in thick
1/2 tsp salt
1 tsp brown sugar
1 Tbsp water

Toppings
1/2 C nicoise olives, pitted and roughly chopped
8 – 10 anchovy fillets, rinsed and roughly chopped (optional: more anchovies for garnish)
2 tsp minced fresh thyme
Black pepper
Olive oil
1 Tbsp minced parsley for garnish

Dough
If you are using instant yeast you can skip the proofing, but if you are using active dry yeast, proof the yeast in the warm water for 10 minutes then proceed with making the dough.

The dough is made very quickly in the food processor but you can also use a stand mixer or mix it by hand

Add the flour, yeast, and salt to the food processor and pulse a few times to combine. With the motor running, add the oil then steadily pour in the water and process until the dough comes together in a ball, about 15 seconds. The plastic dough blade works best for the dough, but I only have a mini food processor and a metal blade so I had to make the dough in two batches then combine the two balls together.

Flour your hands and dust a work surface and knead the dough a bit. But since this is a very wet dough, it's more of a slap/push than a gutsy knead. Shape the dough into a ball. The dough will be wet, sticky (it will be pretty sticky and stick to your hands a bit, but not a lot), and very slack. The high water content of the dough creates the crispy exterior.

Place the dough in a lightly oil a bowl or 4 C measuring cup and cover with plastic wrap. The dough will be at around 2 cups before rising. Let it rise in a warm place until doubled, about 1 hour to 1 1/2 hours.

Onions: While the dough is rising, you can prepare the caramelized onions.
Heat 2 Tbsp of olive oil in a nonstick skillet over medium high heat until the oil shimmers. Add the onions, salt, and sugar. It will look like a lot of onions but it will cook down. Cook the onions, stirring frequently for 10 minutes (should see few patches of brown).

Then turn the heat down to medium low and cook for another 20 minutes until the onions are a golden brown. Off heat stir in the water to loosen the onions and scrape up any brown bits from the pan and set aside.

Making the pizzas
Begin preheating the pizza stone 30 minutes before baking. Remember to put the pizza stone into the oven before heating it and let it heat up gradually with the oven. Set the stone on the lowest rack and heat the oven to 500ºF.

When the dough has doubled, gently turn it out of the container. Cut it in half and form each piece into a ball by gently picking the edges of the dough together into a pouch and pinch to close. Roll the dough ball over, seam side down. Cup the dough with both hands and push the dough around to form a taut ball. Repeat for the second piece. Brush each piece lightly with olive oil, cover with plastic wrap, and set aside for 10 minutes for the second rise.

To form the tart, coat your hand in oil instead of flour. The extra oil will be pressed into the dough for the crispy crust. Hold the dough up and gently stretch it into an oblong oval (like a slipper), about 10 inches long. Place the dough on a sheet of parchment then dimple the surface of the dough with your fingers (this makes it easier to press the dough out). Then using the palm of your hand, push the dough out into an oval, roughly 14 by 8 inches. The surface should be evenly flat but leave a small lip around the dough for the crust. This sounds really complicated but it’s actually very easy.

Crack some pepper over the surface of the dough. Spread half of the chopped thyme, olives, and anchovies on the surface of the tart, making sure to leave a border around the edge of the tart. Then spread half of the caramelize onion on top, it’s easiest to grab handfuls of the onions and spread them with your hands. The onions will continue to caramelize in the oven and they also hide the other ingredients and prevent them from burning.

Slide the pizza onto the pizza stone using a pizza peel or a large cookie sheet and bake for 13 to 15 minutes, until the tart is an even golden brown. (The tart in the picture is a little underbaked because we were too hungry. :) The crust should be more brown than the blonde you see in the picture.) You can fit both pizzas on the same stone or you can bake them one at a time, preparing the second one as the first one bakes.

Garnish with minced parsley.

LinkWithin

Blog Widget by LinkWithin